
RMSv1 firmware upgrade tutorial
Tools Needed
| 1 | A laptop or Desktop PC computer with a standard serial I/O connector. |
| 2 | A standard serial cable with a male and female end connector. |
| 3 | The current RMSv1 firmware.hex file. |
| 4 | Serial device programming software. |
| Note1: | In this tutorial we will use the free device programming software "PonyProg" by Lanconelli Open Systems (Lancos) to flash the RMSv1 board. Download it here! |
| Note2: | Only RMSv1 units that have "REV 1.62" and above stamped into the board can be upgraded to newer firmware. Older board revisions than "1.62" means the RMSv1 circuit board needs a free hardware modification. Send us your old board freight paid and we will make the modifications, flash the board to the newest firmware and ship it back to you freight paid. Or if you wish to take advantage of a newer board with newer features, for a nonminal charge of $150.00 USD we will exchange your old RMSv1 unit for a new RMSv1 unit with the newest hardware, firmware, and a 1 year warranty. |
Getting started:
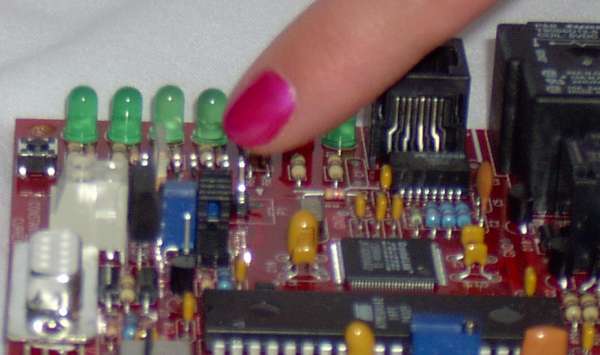
With the RMSv1 unit turned off, locate the programming jumper (JP8) on the circuit board.
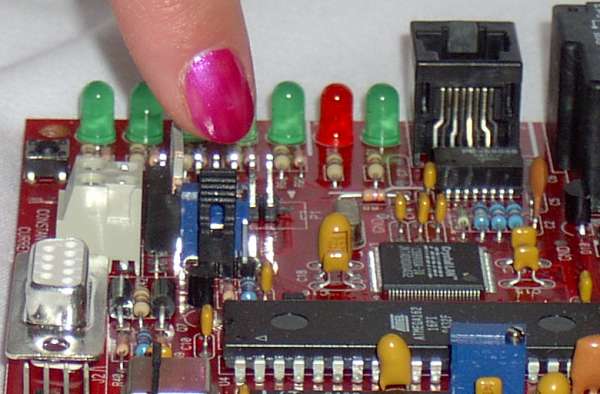
Note that the jumper is a 2 position jumper. In the picture below, the jumper
shunt is oriented to the left most position. In this position the RMSv1 unit is in
Normal Mode. Remove the jumper shunt from the Normal position.
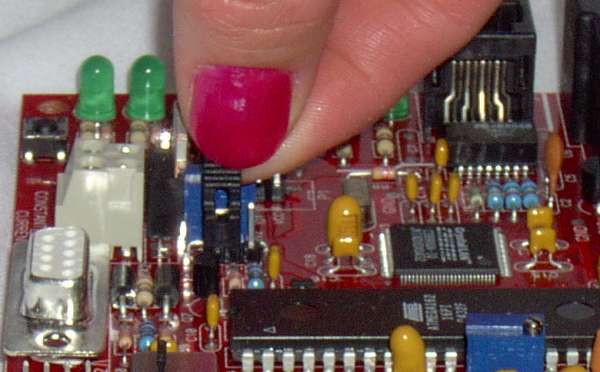
Replace the jumper shunt to the right most position as shown in the picture below.
This position places the RMSv1 board into Serial Programming Mode.
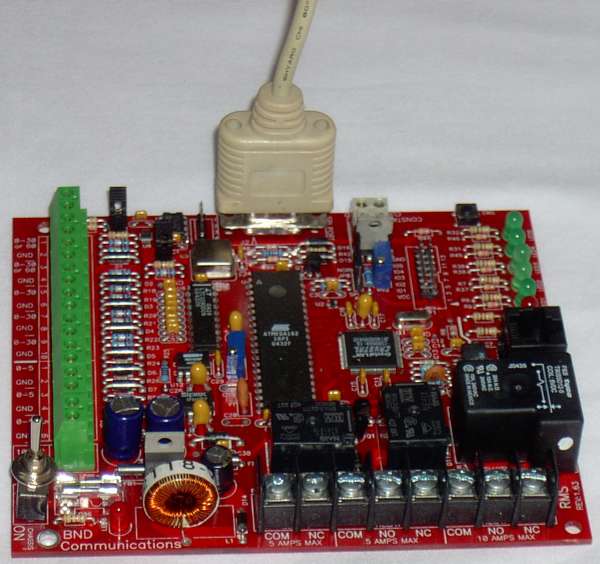
Attach the serial cable to the RMSv1 unit and to your laptop or PC computer.
Turn on your RMSv1 unit.
Getting Ready to Program:
Download the current RMSv1 Hex file from the Download page.
Download and install the programming software "PonyProg" found here.
Run PonyProg.
Setting up the Programming Software:
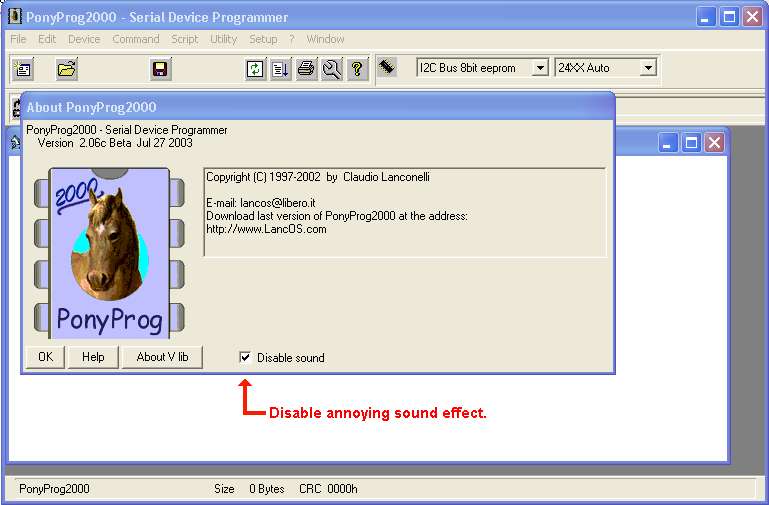
Step 1: Disable annoying sound effect.
Step 2: Press OK. Two warning pop up boxes appear. Click the OK button on both.
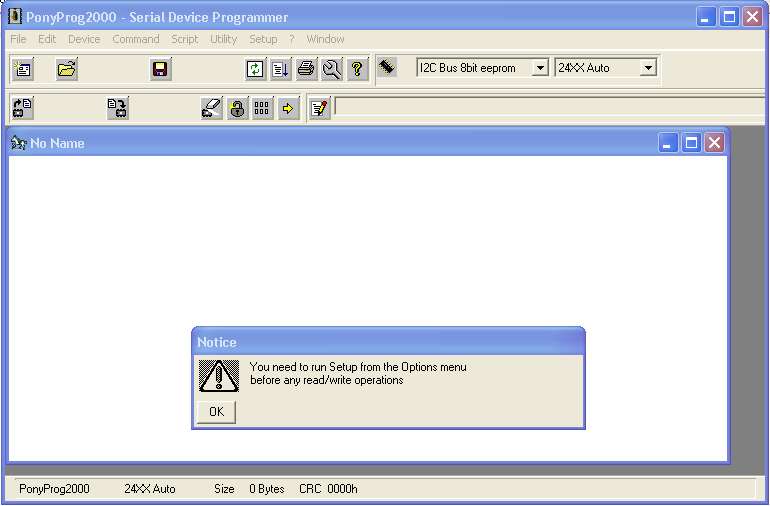
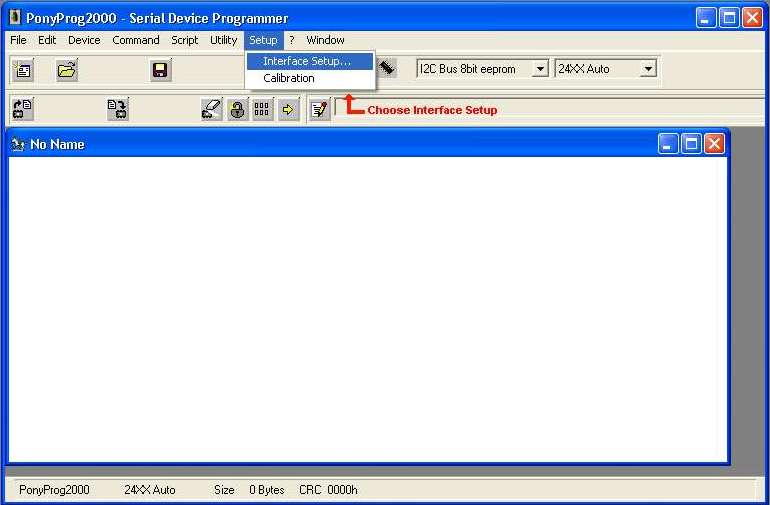
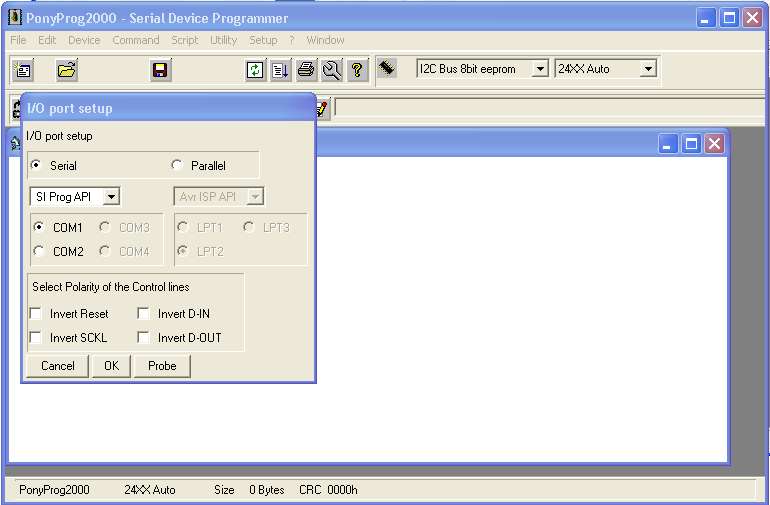
Step 3: Choose Interface Setup from the Setup pull-down menu.
Step 4: Select "Serial", "SI Prog API", and a "Com" port, then click the Probe button.
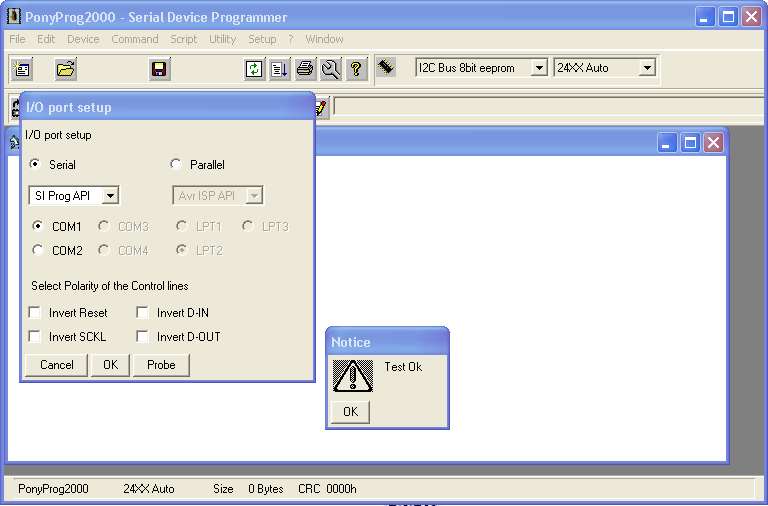
Step 5: If your computer Com ports are setup properly you should get the Test OK notice below.
Proceed to step 6.
If you do not get the Test OK notice, check your Com Port settings in the computer BIOS.
Try using Com 2 instead. Make sure you have a standard serial cable and not a NULL modem cable.
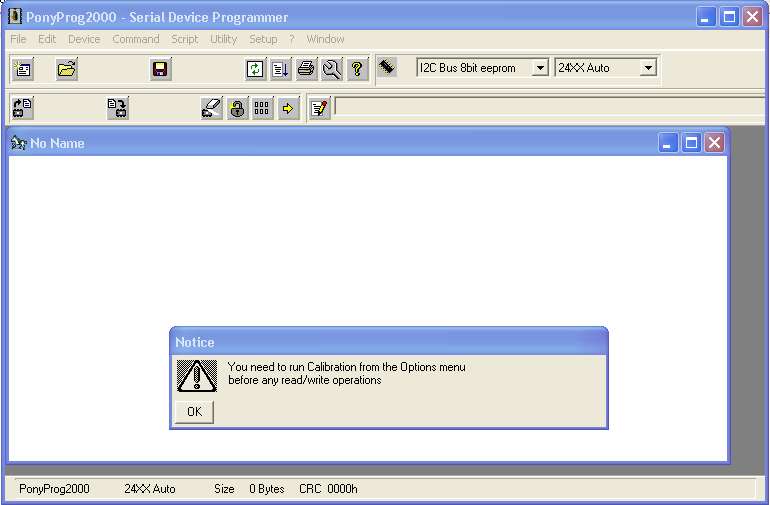
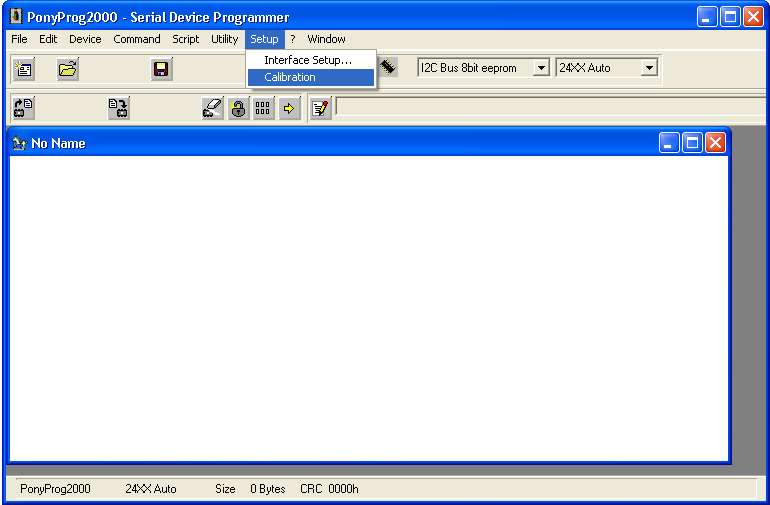
Step 6: Choose Calibration from the Setup pull-down menu.
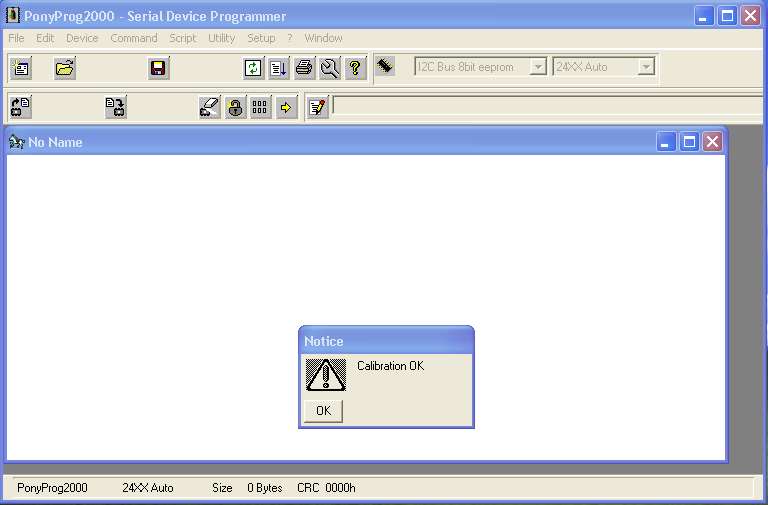
Step 7: Click the YES button to calibrate the software to the transfer speed of your computer.

Step 8: If your computer is not too slow and the Com ports are operational, press OK and
proceed to Step 9.
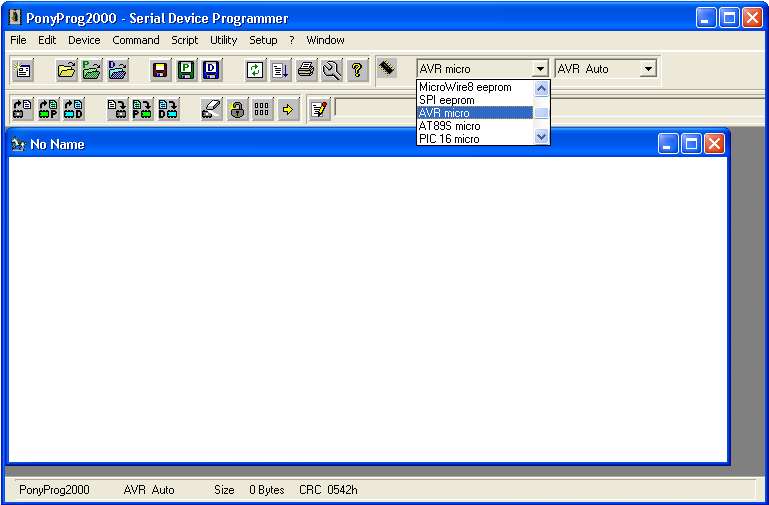
Step 9: Select AVR Micro from the devices drop down combo box.
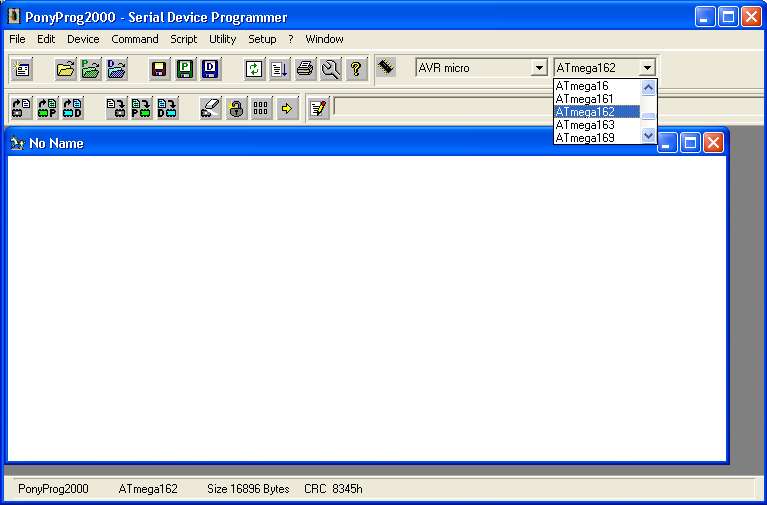
Step 10: Select Atmega 162 from the devices type drop down combo box.
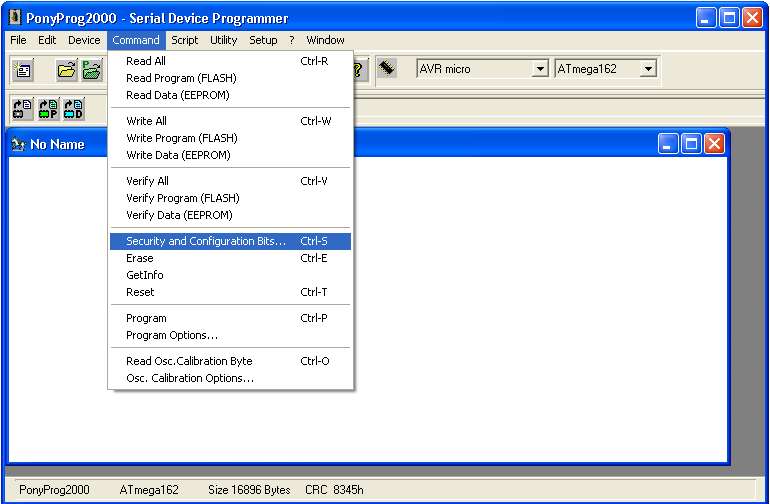
Step 11: Select "Security and Configuration Bits" from the Command pull down menu.
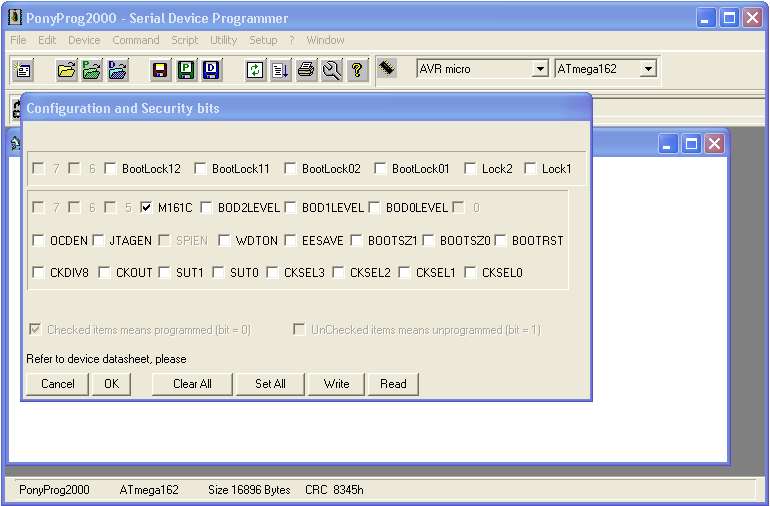
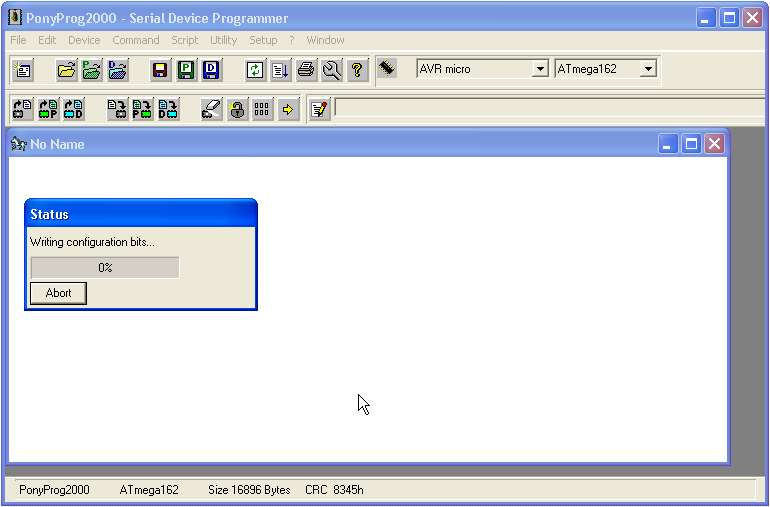
Step 12: Make sure that only the M161C check box is checked. Click on the Write button.
Step 13: The RMSv1 unit is now ready to be flashed to the new firmware. Proceed to step 14.
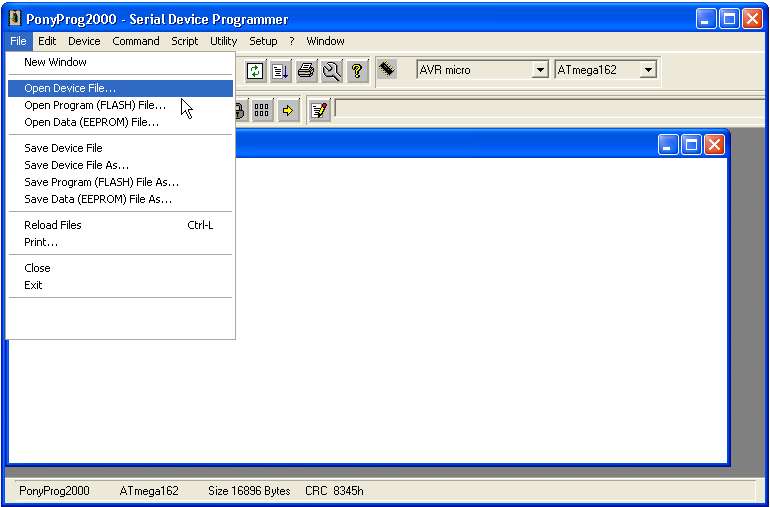
Step 14: Select Open Device File from the File pull down menu.
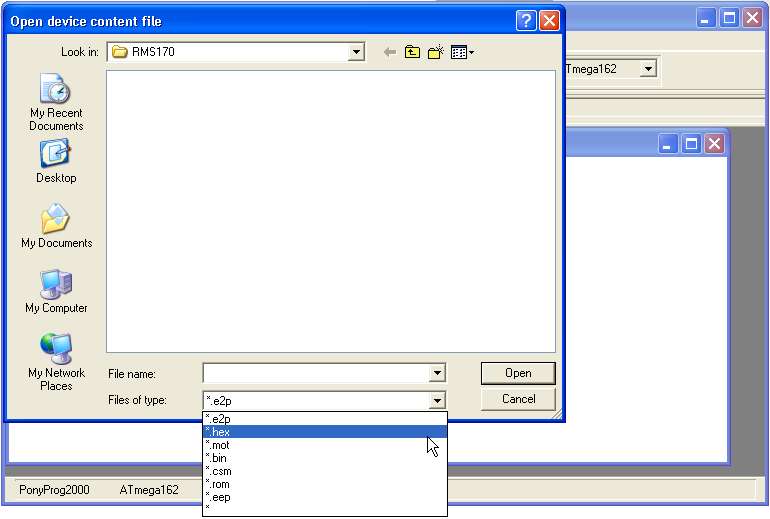
Step 15: Select *.hex from the "Files of Type" drop down combo box.
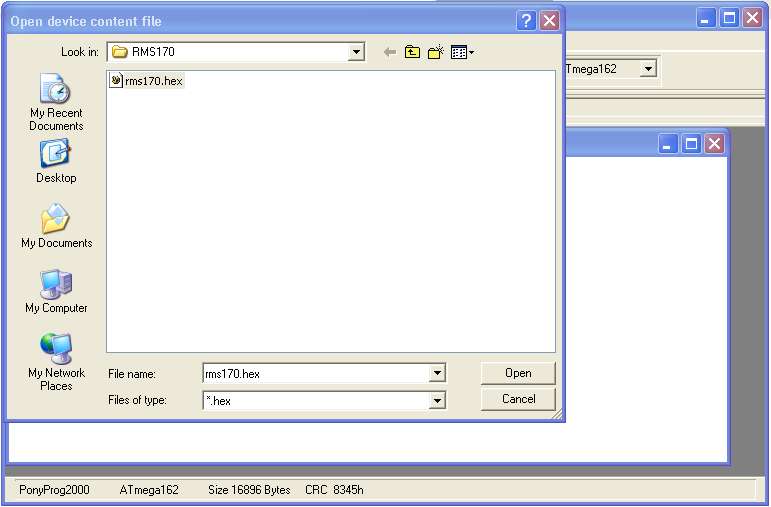
Step 16: Select the rms.hex firmware file you downloaded and click on the Open button.
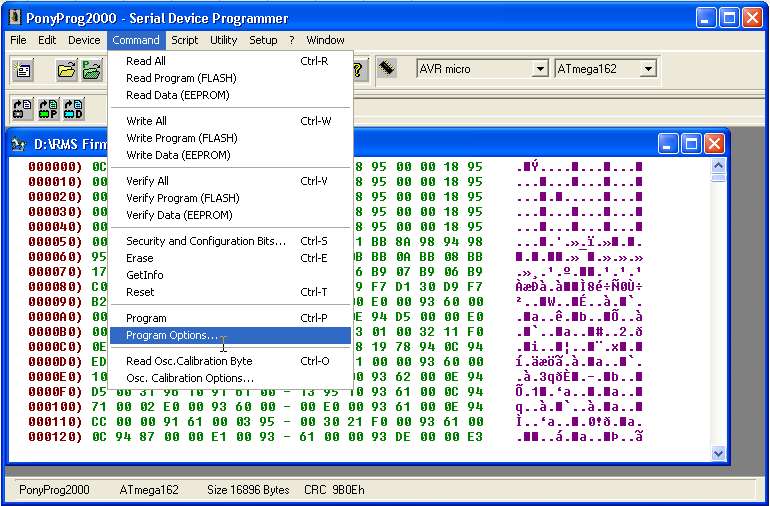
Step 17: Select Program Options from the Command pull down menu.
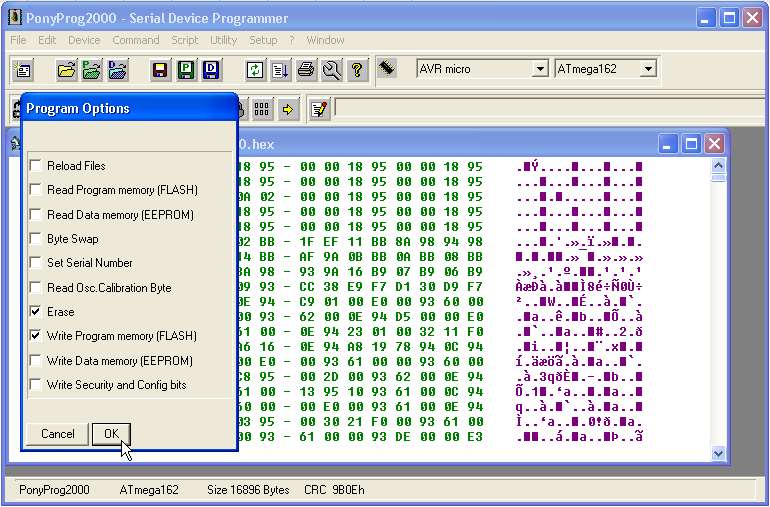
Step 18: Make sure only the "Erase" and "Write Program Memory" check boxes are checked.
Click on the OK button.
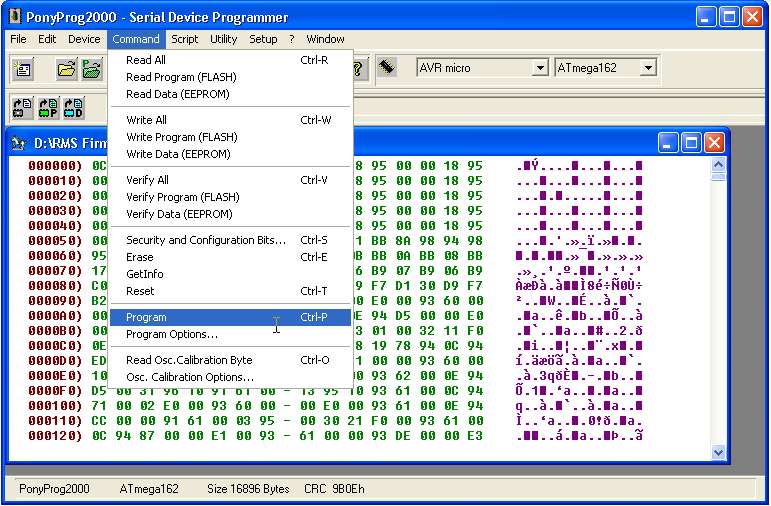
Step 19: Select "Program" from the Command pull down menu to flash the RMSv1 device.
Step 20: The Hex file is being written to the RMSv1 device flash memory.
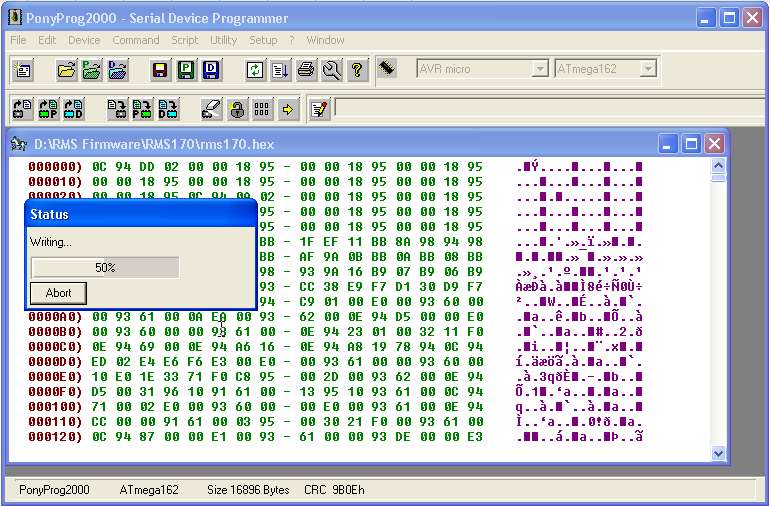
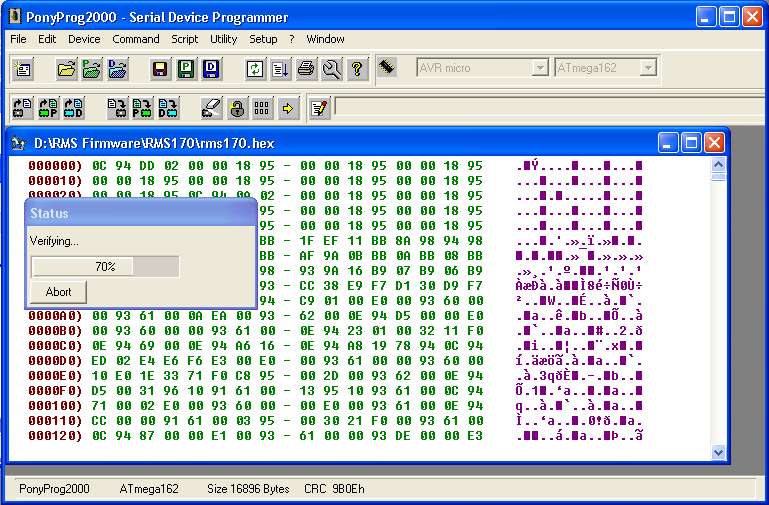
Step 20: The Hex file is being verified with the written code.
Final Steps:
After verifing is complete, turn off the RMSv1 unit. Remove the serial cable and replace
the Programming jumper shunt to the Normal position as shown below.
You have completed the firmware upgrade procedure. Download the
newest RMSv1 client software and configure the RMSv1 unit.
![]()