How to add a nice touch display to your RMSv2 board.
When you are visiting your remote site, it would be nice to be able to see all of your
voltages, temperature, relay status, and other information without getting out your laptop
and having to connect to your RMSv2 board.
A high resolution touch display adds a nice visual aspect to your remote voltage monitoring board
and does not have the limitation of "read only" like other types of displays (LCD, OLED, etc.)
Also, because you can directly interact with the touch display itself, there is no need for
knobs or buttons to navigate through various menus. You can toggle relays or even run a relay script to start
your generator with just a few finger taps on the touch display. Touch displays are generally more durable than
other display types. This is because they are often made of more robust materials to withstand frequent touching and tapping.
The Nextion 3.5 inch Touch Display
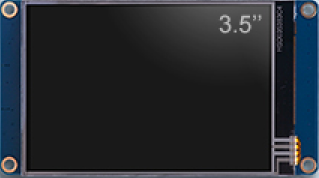
Nextion is a Human Machine Interface (HMI) solution combining an onboard processor and memory touch display.
We chose the Nextion 3.5 inch touch display for several reasons.
- The communication interface is TTL serial, so only four wires are needed (5v, TX, RX, GND).
- Best bang for the buck, less than $40.00 USD.
- High resolution display.
- Easy to program with Nextion Editor software for HMI GUI project development.
- Sleep mode for low power operation.
- Wide temperature range -20 to +70.
- Long term availability.
Hookup and Programming Guide
This hookup and programming guide makes a few assumptions:
- You have purchased a Nextion 3.5 inch touch display.
- You have the latest firmware installed on your RMSv2 board.
- You have a basic knowledge of how to connect wires.
- You are able to connect to your RMSv2 board with an SSH client such as putty.
- You have a basic knowledge of how to type out commands on the Linux command line.
Getting started
- Plug in the supplied cable to the Nextion Touch display (white connector plugs into the Nextion).
- Plug in the the other end of the cable (4 wires) into the RMSv2 board on CON6 using the wiring diagram below.
Be careful to get the colors in the correct position (Red=5V, Blue=TX, Yellow=RX, Black=GND). Making a mistake here could be catastrophic to both the Nextion touch display and the RMSv2 board.

- Next you have to upload the EtherTek TFT image to the touch screen display. There are two different
TFT images stored in the /media directory on your RMSv2 board. One is for use when the cable comes out of the
left side of the touch screen display, and one is for use when the cable comes out of the right side of the
touch screen display. Both TFT images are the same except for the orientation is rotated by 180 degrees.
Log into your RMSv2 board with an SSH client and issue one of the commands listed below. The examples
below are for use on an RMS-300v2, the commands will be similar for other RMSv2 boards. Change the filename
accordingly.
- rmstdupdate -f /media/RMS-300v2-TD-Cable-Left.tft
- rmstdupdate -f /media/RMS-300v2-TD-Cable-Right.tft
If everything is correct, the rmstdupdate program will connect to the touch screen display and begin to upload the TFT image. You should see output on the touch screen display similar to what is shown below.
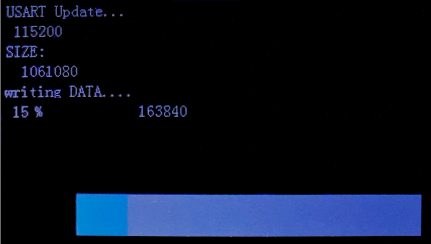
-
Once the update is complete, you need to start the rmstdd program. Using the RMSv2 web interface,
navigate to Setup and then Services to enable the RMS Touch Display Daemon as shown below.

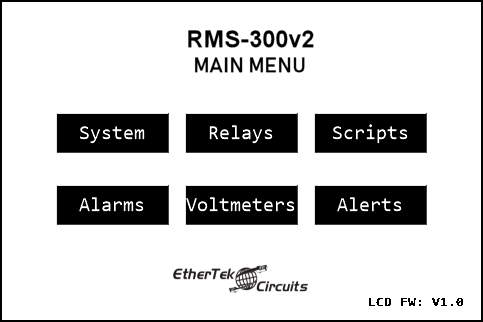
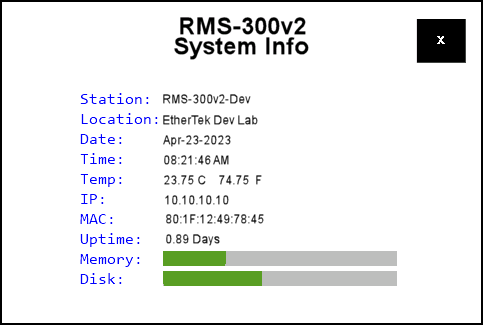
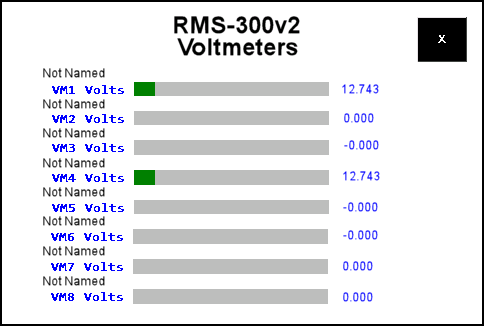
Below are some screen shots of the RMSv2 Touch Screen interface. The touch display is updated in real time.
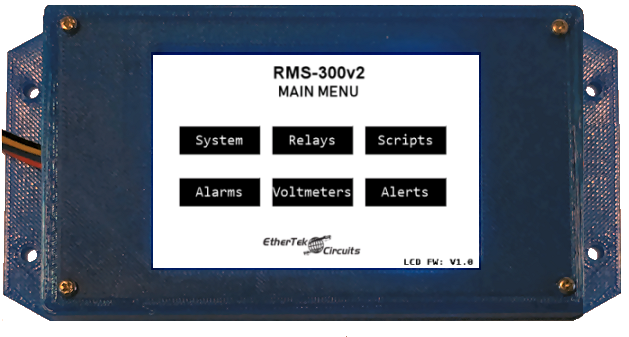
Touch Display Mounted in a 3D printed Enclosure
3D Print the Enclosure and Bezel
If you would like to 3D print your own Nextion 3.5 inch touch display enclosure and bezel, download
the STL files below.
Bezel
Enclosure
Our Story
EtherTek Circuits started its business in 2001. Ever since we have provided remote monitoring and control solutions for Remote Tower Sites, the Oil & Gas industry, Telemetry systems for Agriculture, Municipalities, Mines, Solar Farms, Hydro Plants, and the Military.


